Can You Laser Engrave a Stone? The Definitive 2026 Guide
Last updated June 2026. Based on the stone-engraving questions our team fields from hobbyists, Etsy sellers, memorial shops, and landscapers alike, the short answer is yes — with the right laser, the right settings, and the right stone, laser engraving on stone produces results that last for decades, often outliving the building they're displayed in. This guide is the complete reference: the physics of how a laser actually marks stone, which stones work and which don't, which laser type to buy, exact settings by stone type, full technique walkthroughs, aftercare, business economics, and the mistakes that turn a $50 slab of marble into scrap.

Table of Contents:
- How Laser Engraving Actually Works on Stone
- Which Stones Can Be Laser Engraved (Full Material Guide)
- Which Laser Type to Use, and Why
- Settings by Stone Type — Full Reference
- Full Technique Walkthrough: Prep to Finish
- Common Mistakes and How to Avoid Them
- Common Uses for Engraved Stone
- Turning Stone Engraving Into a Business
- Frequently Asked Questions
1) How Laser Engraving Actually Works on Stone
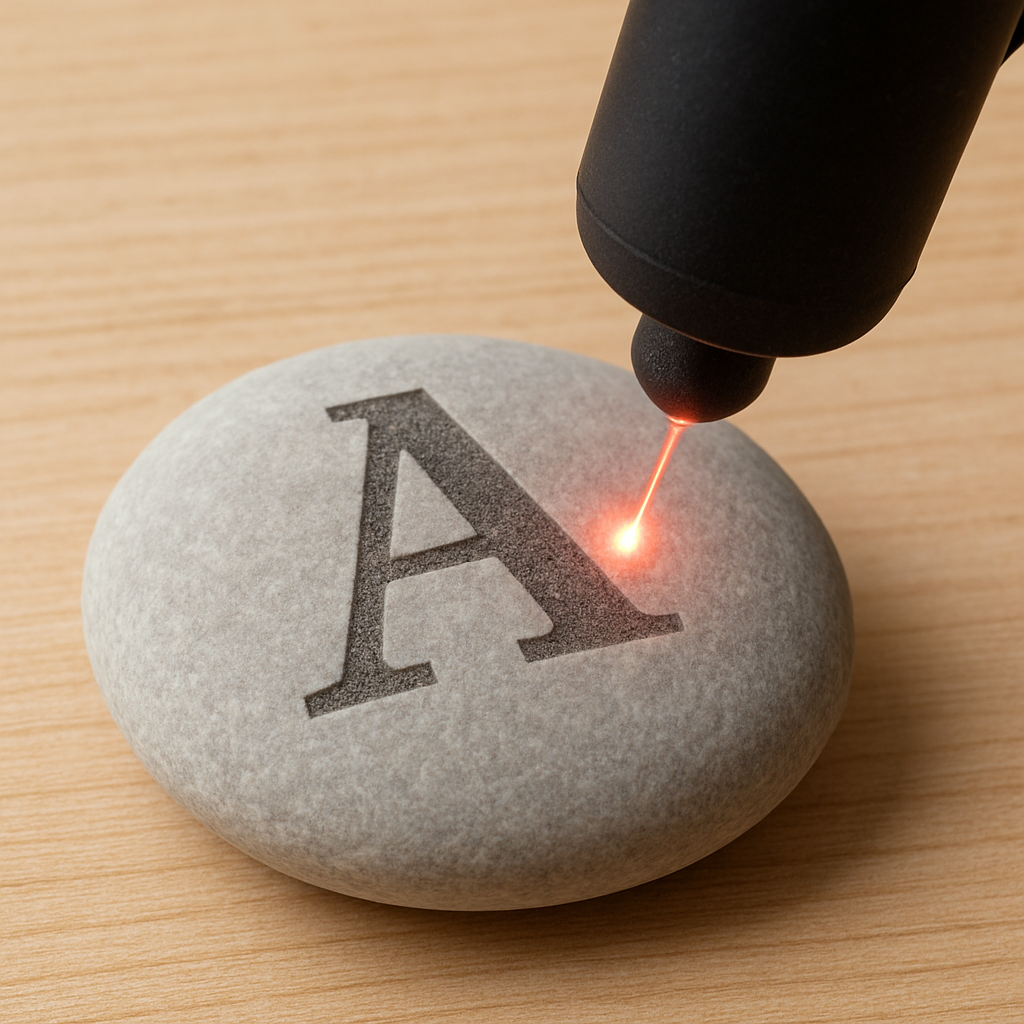
A laser doesn't cut into stone the way a chisel does — it alters the surface using one of two physical mechanisms, and understanding the difference changes how you think about settings. Thermal ablation burns away microscopic amounts of material at the surface, leaving a clean, controlled mark with minimal surrounding disturbance. Micro-fracturing works differently: the rapid, localized heating from the laser pulse causes the crystalline structure just below the surface to fracture at a microscopic scale, and those fractures scatter light differently than the surrounding polished stone, which is what creates the visible mark. Most real-world stone engraving is a blend of both mechanisms operating simultaneously, and which one dominates depends on the stone's specific mineral composition, its existing surface finish, and the laser settings you choose.
This matters practically because it explains why the same settings produce wildly different results on different stones. Granite, with its mix of quartz, feldspar, and mica crystals of varying hardness, fractures unevenly — different mineral grains respond to the same laser pulse differently, which is part of why granite has a reputation for being unpredictable until you've dialed in settings for that specific slab. Marble, by contrast, is calcium carbonate with a more uniform crystalline structure, so it tends to ablate more predictably but is also more prone to chipping under aggressive settings because calcite is softer and the crystal boundaries are weaker.
Contrast — the thing that actually makes a design legible and "pop" — comes down to how the altered surface scatters light differently than the untouched surface around it. Dark stones like basalt or black granite show bright, light-colored marks where the laser ablates or fractures the surface, because the freshly exposed/fractured material scatters light more than the smooth dark polish around it. Lighter stones like white or cream marble rely more on depth and shadow than color contrast, since there's less color difference to exploit — the visible effect comes from the texture difference catching light at an angle. This is also why lighting matters when you photograph or display finished pieces: a marble engraving that looks faint under flat overhead light can look dramatically sharper under raking light from the side.
The smoother the original polish, the sharper and more controlled the final result tends to be, because a polished surface gives the laser a consistent starting point — every part of the beam path encounters the same surface condition. Rough, natural, unpolished stone gives a more rustic, less defined finish because the laser is interacting with an inconsistent surface, with some areas closer to focus than others and surface texture already scattering light unpredictably before you've even engraved anything.

2) Which Stones Can Be Laser Engraved (Full Material Guide)
Based on our experience advising stone-engraving customers across hundreds of projects, three properties determine whether a given stone is worth engraving, and how it will behave: grain fineness (finer grain holds detail better and produces sharper edges on text and fine linework), polish level (a polished surface gives the laser a consistent surface to interact with, while raw stone introduces unpredictability), and natural contrast (dark stones with light fracture-exposure, or pale stones that show depth well, display results most dramatically).
- Granite: Extremely tough and durable — the standard choice for outdoor memorials, headstones, and any piece that needs to survive decades of weather exposure. Its crystalline mix of quartz, feldspar, and mica makes it the hardest stone on this list to engrave evenly; different mineral grains respond differently to the same laser pass, which is why granite engraving has a real learning curve. Once mastered, granite engravings are essentially permanent — weathering, UV exposure, and freeze-thaw cycles barely affect them.
- Slate: The most forgiving stone for beginners, and the material we recommend most often to first-time customers. Its fine, uniform, layered structure is flat, predictable, and produces strong, immediate contrast with minimal settings tweaking. Slate also resists chipping far better than marble, which makes it a low-risk material to practice on.
- Marble: Elegant, premium-looking results, with the stone's natural veining becoming part of the finished design rather than competing with it. Marble's softer calcite structure means it chips and cracks more easily under aggressive settings than granite or slate — it rewards patience and light, repeated passes over a single aggressive one.
- Basalt: A dense, dark, uniform volcanic stone whose tone makes engraved text and graphics stand out with exceptional contrast. Less commonly stocked than granite or slate at most suppliers, but worth seeking out for high-contrast decorative pieces.
- Obsidian: Volcanic glass, not technically a stone in the mineralogical sense — and the trickiest material on this list. Obsidian's glass-like structure fractures unpredictably under concentrated heat, often producing cracks or cloudy haloing rather than clean lines. Sandblasting, or very low-power laser passes combined with masking techniques, consistently outperform a direct full-power laser approach.
- Gemstones (jade, quartz, turquoise, malachite, onyx): Wildly inconsistent depending on impurities, internal clarity, and even the specific mine a stone came from — two pieces of quartz can behave completely differently. Harder gems like jade and quartz need higher power and multiple light passes; softer, more porous gems like turquoise and malachite need low power and fast speeds to avoid shattering or discoloring under heat.
- Pebbles and river stones: Small, naturally smooth, and forgiving — the standard choice for wedding favors, small keepsakes, and garden markers. Their natural rounded shape makes fixturing slightly more involved than flat stone, but the engraving itself is usually low-risk.
If you're just starting out, slate and basalt are the most forgiving choices — both produce strong, satisfying results with minimal settings experimentation. Granite and marble reward more advanced users with museum-quality detail once settings are properly dialed in for that specific batch of stone, but both have a real learning curve and a real risk of ruined material while you climb it. We'd recommend budgeting for at least a few scrap pieces of granite or marble specifically for calibration before committing to a final piece.
3) Which Laser Type to Use, and Why

CO2 lasers are the industry standard for stone engraving, and what we recommend for the vast majority of stone projects. The 10.6-micron wavelength CO2 lasers emit is well absorbed by the silicate minerals that make up most stone, which is exactly why CO2 has become the default tool in this category. CO2 lasers produce crisp, well-contrasted results across granite, marble, slate, and basalt, and the equipment itself spans a wide price range — from sub-$1,000 desktop machines suitable for hobbyist coaster and pebble work, up through industrial machines capable of large memorial slabs. CO2 lasers don't cut through stone — they mark the surface — and extremely hard or thick stone can push lower-wattage CO2 machines to their limits, requiring multiple passes where a higher-wattage machine would finish in one.
Diode lasers work well for small projects — river stones, pebbles, wedding favors, small keepsakes — but lack the power for larger or denser stone surfaces. They're a genuinely fine entry point for hobbyists experimenting on a tight budget, but treat them as a stepping stone (no pun intended) rather than a long-term production tool if you plan to take on granite memorial work or larger commercial orders.
Fiber lasers are built for metal marking, not stone — their shorter wavelength (typically 1064nm) is optimized for metal absorption characteristics, not silicate minerals. They can leave shallow marks on certain stones under specific conditions, but results are inconsistent and rarely match what a CO2 laser produces on the same material. If you already own a fiber laser for metal work, it's worth experimenting with on scrap stone — but don't buy a fiber laser specifically for stone engraving; a CO2 machine will outperform it on every stone project we've tested.
One question we hear often on support calls: can a Glowforge engrave stone? Yes, on softer stones like slate or marble, though results can be inconsistent and harder stones may show little contrast given the Glowforge's fixed power ceiling. If you already own a Glowforge, it's worth testing on scrap material before committing to a real piece — but it's not a reason to buy one specifically for stone work, and dedicated CO2 machines built around stone/wood/acrylic work will generally outperform it.

4) Settings by Stone Type — Full Reference
Based on the test results our team has walked customers through across hundreds of stone projects, here are realistic starting points. Treat every number here as a starting point, not a guarantee — always run a test grid on scrap material first, since stone is a natural material and every batch, and sometimes every individual piece, varies slightly in density and mineral composition:
| Stone | Power | Speed | Passes | Notes |
|---|---|---|---|---|
| Granite | 30–40% | Slow | 2–4 | Each pass deepens and sharpens the design; lighter engravings show best contrast on dark granite; expect inconsistency between mineral grains |
| Marble | 10–20% | Fast | 3–6 light passes | Treat as fragile — heavy settings cause cracks and chips; build up detail incrementally rather than in one pass |
| Slate | 20–30% | Moderate | 1–2 | Most forgiving stone; strong contrast appears with minimal tweaking; rarely chips |
| Basalt | 25–35% | Moderate-slow | 2–3 | Dense and uniform — more predictable than granite, with strong contrast against its dark base color |
| Obsidian | 5–15% | Fast | 1, with masking | High fracture risk — consider sandblasting instead for critical pieces |
| Hard gems (jade, quartz) | Higher power | Slow | Multiple, with cooling breaks | Crisp results possible but requires patience and test pieces; behavior varies piece to piece |
| Soft gems (turquoise, malachite) | Low power | Fast | Few, with cooling breaks | High shatter risk — take breaks between passes to avoid thermal stress buildup |
Resolution matters as much as power and speed: 250–500 DPI is the general sweet spot for stone. Lower DPI (around 250) suits bold, simple designs and text, and engraves faster with less risk of overheating a small area. Higher DPI (toward 500) is necessary for photo-realistic engravings or fine script, but takes proportionally longer and concentrates more heat in a smaller area, so it's worth dropping power slightly when you push DPI up to compensate.
A note on focus: stone surfaces are rarely perfectly flat, even when they look it. A focus offset of even a millimeter can noticeably change how a design renders, especially on lower-power passes for marble. If your machine supports it, running an autofocus pass or manually re-checking focus partway through a large piece is worth the extra few minutes.

5) Full Technique Walkthrough: Prep to Finish
Preparing the surface
Clean dust and debris from the stone so the laser is working on a smooth, consistent surface — even fine dust can scatter the beam slightly and soften edge definition. Position and secure the stone so it absolutely cannot shift mid-job; a stone that moves even a fraction of a millimeter mid-engrave will produce a visibly doubled or blurred design. On polished stone, masking tape applied over the engraving area before you start can reduce scorch marks and smoke residue on the surrounding finish — peel it back immediately after engraving, since residue left too long can be harder to clean off.
Always run a test grid first
A test grid — a small matrix of squares, each engraved at a slightly different power and speed combination — engraved on scrap material or a hidden corner of the actual piece tells you exactly how that specific stone batch will respond before you commit to the final design. This single step prevents the large majority of ruined projects we hear about on support calls. Label each square with its settings as you go (a simple grid with power along one axis and speed along the other, engraved directly next to each test square, works well) so you're not guessing which combination produced which result.
Building up depth and contrast
For most stones except slate, a single aggressive pass produces worse results than several lighter passes. Each pass removes a small, controlled amount of material or causes a small, controlled amount of fracturing — running several passes lets you watch the design develop and stop exactly when contrast and depth look right, rather than committing to a single irreversible pass. This is especially important on marble and gemstones, where the margin between "not enough" and "cracked" can be narrow.
Sealants and aftercare
Once the engraving is complete, a clear stone sealant (the same category of product used for sealing natural stone countertops works well) protects it from weather, dirt, and general wear — particularly important for outdoor pieces like garden stones, signage, or memorials that will face years of rain and UV exposure. Apply sealant only after the stone is fully clean of engraving dust and debris, following the product's specific cure time before exposing the piece to weather. Regular wiping with a damp cloth, rather than abrasive cleaners, helps keep the engraving sharp and the surrounding polish intact over time.
6) Common Mistakes and How to Avoid Them
- Overpowering the laser: Cranking power up to get a darker mark faster is the most common beginner mistake — on stone, it scorches, chips, or cracks the material instead of producing a cleaner result. Several lighter passes consistently produce better, more controllable results than one aggressive pass, even though it takes longer.
- Skipping the test grid: Every stone — even within the same supplier batch — behaves slightly differently due to natural variation in mineral content and density. Testing first is genuinely cheap insurance against ruining a final piece that may have cost significantly more than the test material.
- Poor ventilation: Stone engraving generates fine mineral dust and fumes that shouldn't be breathed in, particularly with stones containing crystalline silica like granite. Run your laser in a well-ventilated space or with a proper extraction system, and use safety goggles and a dust mask as standard practice, not an afterthought.
- Ignoring focus drift on large pieces: On larger memorial slabs or signage, the stone surface may not be perfectly flat across its full area. Re-checking focus at multiple points before a long engraving run prevents one section coming out crisp while another looks soft.
- Removing masking tape too late: Smoke and scorch residue left under masking tape for too long after engraving can be harder to clean off than if removed promptly. Peel masking immediately after the job finishes, while the surface is still warm.
7) Common Uses for Engraved Stone
Decorative and personalized projects — coasters, plaques, keepsakes, wedding favors engraved on pebbles — make up the bulk of hobbyist and small-business work, and tend to be the best entry point for someone new to the material since the stakes per piece are relatively low. Event décor and signage, like table markers on polished pebbles or a boutique shop sign on slate, combine rustic material with precise detail in a way that photographs well for marketing.
Memorial work — gravestones and markers — relies on laser engraving specifically because the lettering remains legible for decades of outdoor exposure, and the precision possible with a laser allows for fine detail (portraits, intricate religious or family symbols) that traditional hand-carving struggles to match at comparable cost. Garden and landscaping stones, from plant labels to custom stepping stones, hold up to weather far better than painted alternatives, which fade and chip within a season or two outdoors.
8) Turning Stone Engraving Into a Business
Stone engraving occupies a less crowded niche than wood or acrylic personalization — most general engraving shops default to tumblers, plaques, and signage rather than stone specifically, which leaves real room for a shop that builds a reputation around stone work. Memorial and garden-stone work in particular tends to be local-search-driven (people searching for "engraved memorial stone near me" rather than browsing Etsy broadly), which rewards a strong local online presence and word-of-mouth from funeral homes, garden centers, or wedding vendors more than broad marketplace listings.
Pricing for stone work typically runs higher than equivalent wood or acrylic engraving, both because material costs are higher for quality stone and because the skill ceiling (especially for granite and marble) is genuinely higher — customers are paying for both the material and the expertise to engrave it without cracking it. Coasters and small keepsakes are a reasonable entry point to build a portfolio; memorial and large signage work command the best margins once you've built a track record of clean results on harder stones.
9) Frequently Asked Questions
What's the best laser for engraving granite specifically?
A CO2 laser at 30–40% power and slow speed, run as 2–4 passes, is the most reliable approach for granite. Its dense, crystalline structure resists lower-power settings and responds unevenly across different mineral grains, so plan for a slower, more iterative process than slate or marble, and expect a real learning curve before results are consistent.
Can you laser engrave obsidian?
Technically yes, but obsidian is volcanic glass and fractures unpredictably under concentrated heat. Sandblasting, or very low-power laser passes (5–15% power) combined with masking, produce more reliable results than a standard direct laser approach — reserve full-power laser passes for stone, not glass-like materials.
How long does laser engraving last on stone?
Properly engraved stone — especially granite and slate — lasts decades, including full outdoor exposure to weather, UV, and freeze-thaw cycles. This durability is the main reason laser engraving is the standard choice for memorials and garden markers over painted or printed alternatives, which fade within a year or two outdoors.
Do I need a different laser for gemstones than for granite or slate?
The same CO2 laser works for both, but settings differ substantially and gemstones are far more inconsistent batch-to-batch — and piece-to-piece — than granite or slate. Test pieces matter even more here, and harder gems like jade need very different settings than softer ones like turquoise or malachite.
Why did my granite engraving come out patchy instead of uniform?
This is almost always the crystalline structure showing through — granite is a mix of quartz, feldspar, and mica grains with different hardness, and they don't all respond identically to the same laser pass. Running additional passes at moderate power typically evens this out better than a single high-power pass, which tends to exaggerate the unevenness.
Curious what it costs to have stone engraving done professionally, or want help picking the right CO2 laser for your specific project? See our stone engraving pricing guide, or reach out to our team directly.


Leave a comment