
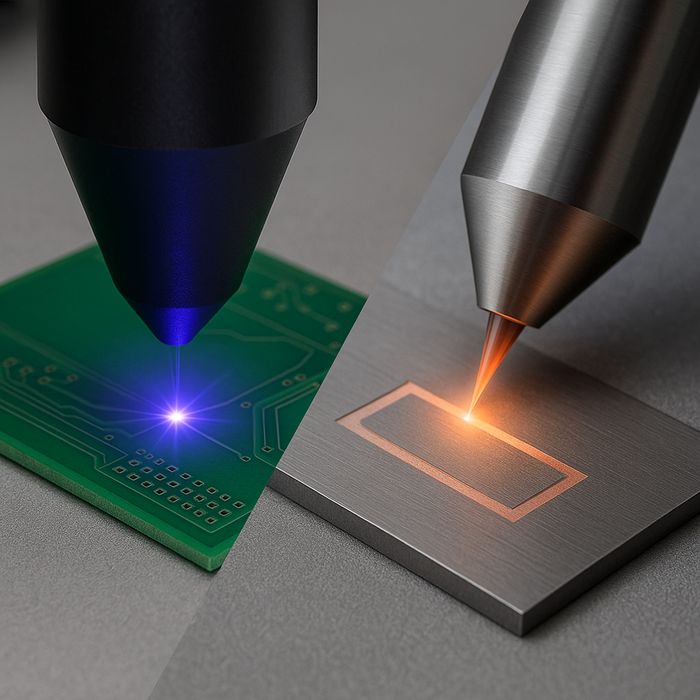
xTool F2 Ultra UV vs ComMarker Omni X UV: Comparing Flagship UV Laser Engravers
Compare the xTool F2 Ultra UV vs. ComMarker Omni X UV. See key differences in power, camera, safety, and performance to choose the best UV laser engraver for your needs.
Compare the xTool F2 Ultra UV vs. ComMarker Omni X UV. See key differences in power, camera, safety, and performance to choose the best UV laser engraver for your needs.
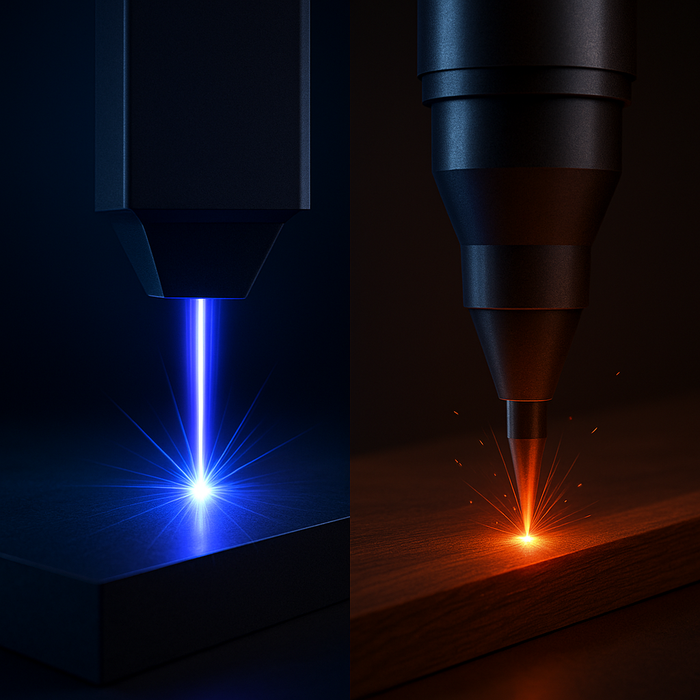
Choosing between UV and IR lasers is like picking between a scalpel and a hammer — both powerful, but built for different kinds of precision. This in-depth guide breaks down how each laser interacts with materials, their strengths, weaknesses, and which one truly delivers the best results for your marking applications.
Confused about whether a UV or CO2 laser is right for you? This in-depth guide breaks down how each laser works, the materials they handle best, and where they truly shine. From high-precision UV marking to powerful CO2 cutting, discover which technology fits your projects — and explore our UV Laser Engravers Collection Page for expert picks.
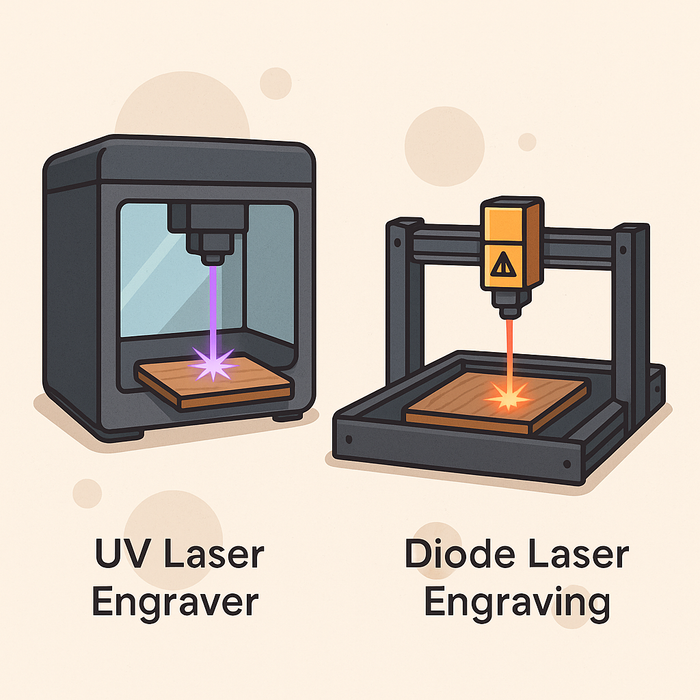
Choosing between a UV and a diode laser can be confusing — one’s a precision specialist, the other a creative workhorse. This detailed comparison breaks down how each works, their performance, material compatibility, and real-world applications so you can confidently pick the perfect engraver for your craft or business.

Choosing between a 5W and 10W UV laser isn’t just about power — it’s about purpose. Whether you’re engraving fine jewelry or running high-volume production, understanding how wattage affects precision, speed, and material compatibility can save you time, money, and frustration. Find your perfect laser match in this complete guide.

Laser engraving isn’t all precision and profit—there are real risks too. From fire hazards and toxic fumes to machine upkeep and market competition, here’s what you need to know before jumping in.

Thinking about buying a laser engraver? From ROI and workspace setup to outsourcing vs. ownership, here’s what small businesses need to know before investing in this powerful tool.

Choosing the right laser engraver can make or break your small business. From wood signs to metal tags, the right machine expands your product range, boosts efficiency, and keeps customers coming back. Here’s how to pick the perfect engraver for your goals, budget, and materials.

Figuring out what to charge for laser engraving isn’t just about covering costs — it’s about knowing your value. From competitor benchmarks to bulk discounts and add-ons, this guide shows you how to set smart rates that boost profits without scaring off customers.

Choosing between 10W, 20W, CO₂, or fiber laser engravers comes down to your projects and goals. From Etsy sellers engraving tumblers to industrial shops marking metal, this guide breaks down power, materials, and costs so you can pick the right machine with confidence.

From tumblers and plaques to jewelry and industrial parts, laser engraving opens up multiple revenue streams for small businesses. With margins often reaching 30% or more, the right niche, pricing strategy, and machine investment can turn creativity into a profitable, long-term business venture.

Choosing the best laser engraver for your small business depends on what you make and how you work. From the versatile ComMarker Omni 1 UV to the portable Gweike G2 Max Fiber and all CO2 workhourse Flux Beambox II CO2, here’s a guide to picking the right machine for growth and creativity.

From coasters and keepsakes to gravestones and gallery-worthy art, laser engraving on stone offers endless creative possibilities. Granite, slate, and marble each bring unique benefits, whether you’re making personalized gifts, business signage, or durable memorials. Discover how stone engraving transforms everyday projects into something timeless.

Granite, slate, and obsidian can all be engraved—but each stone comes with its own quirks. Granite is tough and permanent, slate is high-contrast and versatile, and obsidian dazzles when handled carefully. Learn the best techniques, tools, and tips for each.

Not all stones are created equal when it comes to engraving. Slate and limestone are beginner-friendly, basalt offers durability, and granite or quartz provide long-lasting detail but require more effort. Learn which stones, tools, and techniques pair best for stunning results.

Engraving stones at home is easier than you think. Whether you use a Dremel or a laser engraver, this guide walks you through tools, step-by-step methods, and safety tips to create personalized designs that last.

Stone engraving prices can range from $30 for small decorative pieces to $500+ for gravestones. Learn how stone type, size, and design complexity affect costs—and how to budget smart for your project.

Granite engravings aren’t just beautiful — they’re built to last. Discover why granite outperforms softer stones, what affects the longevity of laser engravings, and how simple care and maintenance can keep designs crisp for generations.

Laser engraving stone isn’t guesswork—it’s about knowing your material and dialing in the right power, speed, and resolution. From granite’s stubborn toughness to marble’s delicate beauty, this guide breaks down the best settings, tips, and tricks to help you create sharp, professional results.

Not all lasers are created equal when it comes to stone engraving. From CO₂ lasers that handle the heavy lifting to diode lasers perfect for smaller projects, each type has its place. Curious about Glowforge, slate coasters, or even obsidian? Here’s what you need to know.

Laser engraving has become the go-to method for marking stone, offering sharp detail and lasting results that older techniques can’t quite match. From prepping the surface to dialing in your settings, this guide walks you through the essentials—plus a few tips to keep your engravings looking flawless.

Laser engraving on stone isn’t just possible—it’s an art form. From granite coasters to marble plaques, lasers can transform ordinary rocks into personalized keepsakes. Discover how the process works, which stones engrave best, and why this technique is perfect for gifts, décor, and even business.

Thinking about laser engraving coins but worried it’s too complicated? The truth is, it’s easier than you might think once you understand the basics. From software and machine skills to handling dust and safety, this guide breaks down the learning curve and helps you decide if investing in a laser engraver is worth it.

Keeping your Filtrabox Laser Fume Extractor in top shape doesn’t take much—just smart cleaning, timely filter swaps, and quick fixes for common hiccups. This guide shows you how to maximize efficiency, extend lifespan, and keep your air clean with simple, practical maintenance steps.

Laser engraving coins isn’t just a fun hobby—it can actually be a profitable business. With rising demand for custom challenge coins, military keepsakes, and collector’s editions, engravers have the chance to turn creativity into steady income. Learn how to price, position, and stand out in this growing niche.

Curious if engraving coins is legal? From federal laws to ethical guidelines, this article breaks down what’s allowed, where exceptions apply, and how to avoid trouble. Whether you’re personalizing challenge coins or creating gifts, learn the rules before firing up the laser.

Setting up your Filtrabox Fume Extractor the right way makes all the difference. From smart placement and safe filter swaps to simple maintenance checks, this guide walks you through how to keep your air clean, your lungs safe, and your laser running at its best.

Yes, you can make challenge coins with a laser engraver — and the results can rival traditional minting. From materials and equipment to costs and legal considerations, this guide covers everything you need to know before creating your own custom coins.

Not sure whether the Filtrabox Micro or Compact X is the right fit for your workspace? This guide breaks down features, specs, and real-world uses so you can match the perfect fume extractor to your laser setup.

Laser cutting may look clean, but the fumes tell another story. A Filtrabox Laser Fume Extractor captures smoke, dust, and harmful gases before they harm your health or your machine. Learn how its multi-stage filtration keeps workshops safer, cleaner, and more efficient.

The xTool P3, P2S, and P2 are all powerful CO2 laser cutters, but which one is right for you? This guide compares power, speed, safety, and price — complete with spec tables and recommendations — to help you pick the perfect machine for your workshop or business.

Confused between the ComMarker Omni X, Omni XE, and Omni 1 UV laser engravers? You’re not alone! This guide breaks down the key differences — power, autofocus, 3D engraving, supported accessories, pricing, and who each machine is best for. Short, simple, and designed to help you confidently choose the right UV laser for your business or creative journey.

UV laser engravers can cost anywhere from $2,000 to over $20,000, depending on power, features, and scale. This guide breaks down prices by machine type, explains hidden costs, and helps you decide whether a UV laser engraver is a smart investment for your business or creative projects.

Fiber vs. UV lasers isn’t just a tech debate — it’s about picking the right tool for your material. Fiber lasers thrive on metals, while UV lasers excel with delicate surfaces like plastics and glass. This guide breaks down how each works, where they shine, and which is right for you.

UV laser engravers bring precision and versatility to a wide range of materials — from plastics and glass to metals, wood, and even delicate fabrics. This guide explores exactly what UV lasers can (and can’t) engrave or cut, with real-world examples, industry uses, and key limitations you should know.

Starting an Etsy shop can feel overwhelming, especially if you’re new to selling handmade items or using a laser engraver. But with the right strategy and tools, like a CO2 Laser Cutter, turning your hobby into a meaningful side hustle and...


Laser engraving on slate is a popular technique that transforms a simple piece of stone into a personalized and beautiful work of art. This method allows individuals to create custom designs that can enhance home décor, serve as unique gifts,...


On September 12, 2024, xTool launched an upgraded version of their flagship desktop CO2 laser engraver, the xTool P2, releasing the xTool P2S. We dive into the details about what the upgrades are and whether they are worth it! Our...


Finding the right laser engraver for deep coin engraving can significantly enhance any engraving project. The top options available today offer precision, speed, and versatility, making them ideal for anyone looking to create stunning designs on metal coins. From hobbyists to professionals, understanding the essential features of these machines is crucial for achieving the best results.


Many firearm owners seek to personalize their weapons in unique ways. Laser engraving offers a precise and durable method to customize firearms, allowing for personal logos, graphics, or classic designs. This technique not only enhances the aesthetics of the firearm...


Starting a laser engraving business can be a rewarding venture for those with the right strategy and tools. Understanding the profit margins and market realities is essential for building a successful and sustainable business. This industry offers diverse applications, ranging from personalized gifts to industrial parts, making it a creative and profitable option for many entrepreneurs.
Shipping Insurance ($89)
